Frequently Asked Questions and Document Links
- Administrative Order (AOSC24-65) - Access to Electronic Court Records
- Access Security Matrix
Viewing Documents
Types of Documents
Viewable Image
 -
Dockets with the View Image icon are available for viewing. Just click the icon to download and view the document.
Viewable On Request (VOR)
 -
Dockets with the VOR icon are not available to view right away. A request must be sent to the clerk for review first. Please see 'How do I view a VOR
document?' to learn how to submit VOR requests.
VOR Requested
 -
Dockets with the hourglass icon are VOR documents that have been requested for viewing. After the clerk has finished the VOR process for the requested
document, the hourglass icon will update to the view document icon.
Document in Redaction (RED)
RED - Dockets currently in redaction with the clerk will become available after completion.
Confidential
 -
Dockets marked as confidential are not viewable.
How do I view a VOR document?
1) Click the lock icon under the View Image column on the docket you wish to view.

2) Submit the form that shows with or without your email address. If you submit with your email address you will be notified when the document is ready for
viewing. If you submit without your email address check back within 24 business hours.
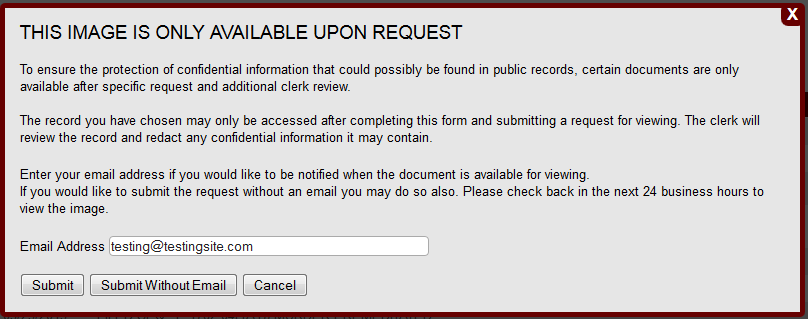
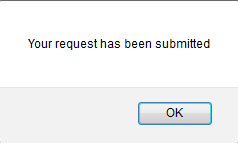
3) After submitting click OK on the confirmation box. You will then see the icon change to the VOR queue icon.

4) After the document has completed the VOR process you can now view the document.

How can I request multiple VOR documents at once?
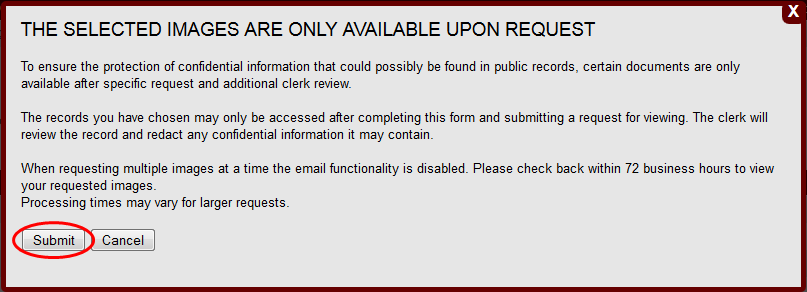
1) If you want to submit multiple VOR documents in one request you can do so; however, the email functionality is not available. Prosessing times may var depending
on the number of documents requested. You will need to check back within 72 business hours.
Under the dockets section, click Request Multiple VOR Documents.

2) A new check all box and submit button option will appear.

All of the VOR locks will now have checkboxes next to them as well.

3) Check the documents that you wish to request and click on Submit Checked VOR Documents.

4) Click Submit and then OK on the confirmation message. The docket icons will then change to the VOR queue icon.

5) After the documents have completed the VOR process, you will be able to view them. Remember to check back within 72 business hours.

User Account
How do I change my password or update my account information?
1) While logged in, click on My Account on the main toolbar at the top.

2) On this page you can update your first and last name as well as update your email address. To save your changes click the Update button.
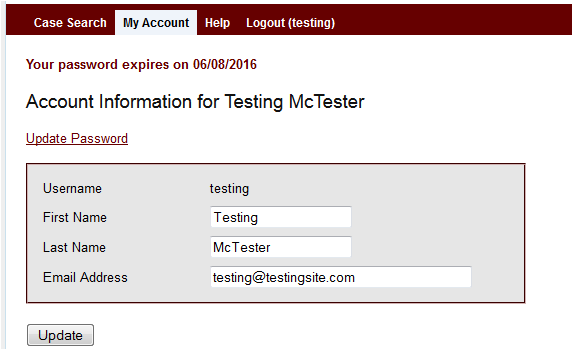
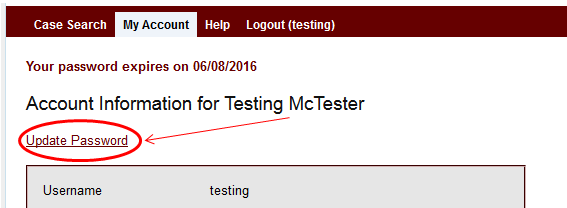
3) To update your password click on the Update Password link.
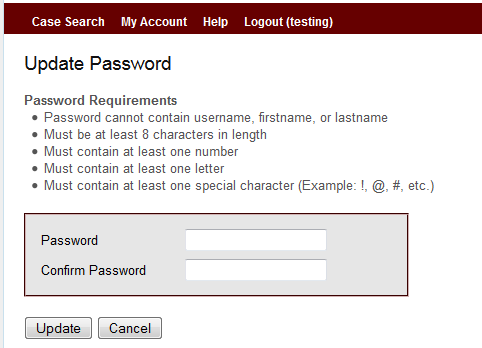
4) Here, enter your new password and confirmation password following the password requirements. Click on the Update button to save your changes.
I forgot my password, how do I reset it?
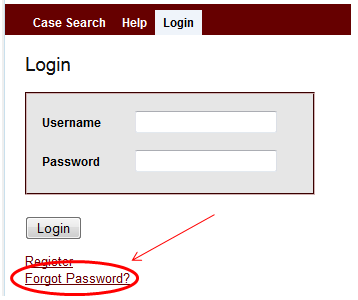
1) If you have forgotten your password, click on the Forgot Password link at the bottom of the login page.
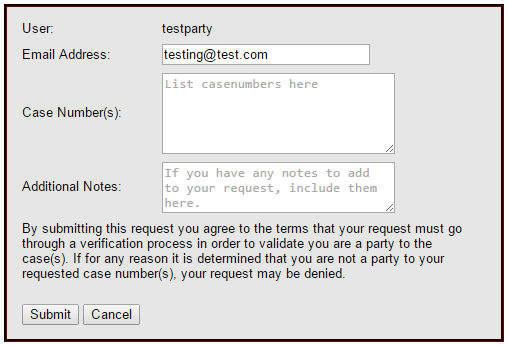
2) Enter you email associated with your account and click the Submit button.

3) If the email address is valid an email containing password reset instructions will be sent and confirmation message will show.

How can I get access to another case after I am already registered that I am a party to?
1) Make sure you are currently logged into SCORSS and click on My Cases.

2) Click on 'Request Additional cases(s) as a PARTY to case.'

3) Input your email address if it's not already there, the case number(s) you are requesting, and any notes of applicable. Click Submit after completion.
Gatekeepers
How do I accept user registrations for my organization?
1) After a user registers on behalf of your organization and approved by the clerk you will receive an email notification. Log into SCORSS and click on the Activate
Pending Accounts link. The number indicates how many pending registrations you have.

2) Here you can either approve or deny a user registration by clicking on the appropriate button. After approving a user, they will recieve an email notification informing them
that their account is ready for use. Once a user is approved or denied they will be removed from the queue.

How do I remove a user who has left our organization?
1) When a user has left your organization, it is the gatekeeper's responsibility to unlink them from your organization through SCORSS. Begin by clicking on Manage Users under the
Admin menu.

2) Click on the user that you want to remove.

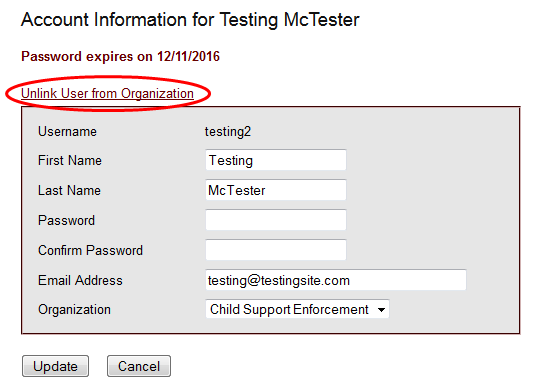
3) Click on Unlink User from Organization. Then click OK for the Remove user from organization prompt.
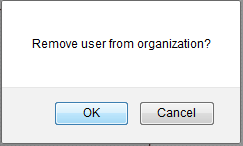
4) After you click ok, the organization will then display "No Organization, click Update to save changes." Make sure to click Update to completely remove the user
from your organization.
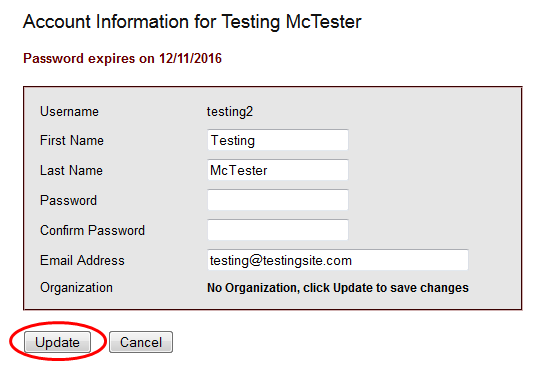
5) The user will then be removed from your organization and their role be reassigned to a registered user.

A user did not change their password when prompted and now their account is expired.
How can I unlock their account?
1) To unlock a user's account, you just need to change their password. A user cannot reset their own password if their account is expired. Go to Manage Users under the
Admin menu.

2) Click on the desired user.

3) Input a new temporary password and matching confirmation password for the user and then click Update. This password is temporary and the user will be
prompted to change the password to their choosing after logging in.
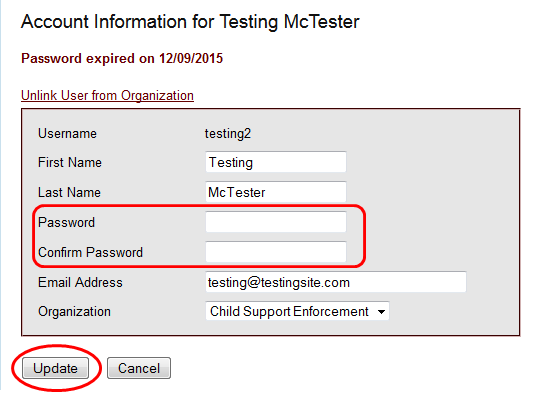
4) If successful, the account will be updated and the temporary password will be valid for 5 days. Inform the user they can now log into their account with the
temporary password you have set.

Escrow Accounts
How do I add/view my Escrow Statement?
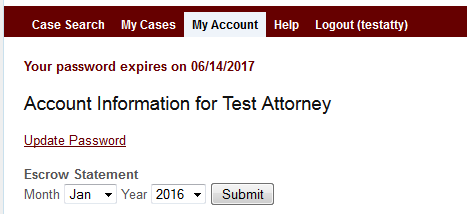
In order to add the ability to view your escrow statement through SCORSS, please send an email request to scorss@citrusclerk.org.
After your escrow account has been linked to your profile you can view your statement by logging into SCORSS and clicking on My Account. You will
then see the option to view your Escrow Statement.
Attorneys
How can I view case events/hearings scheduled for my cases?
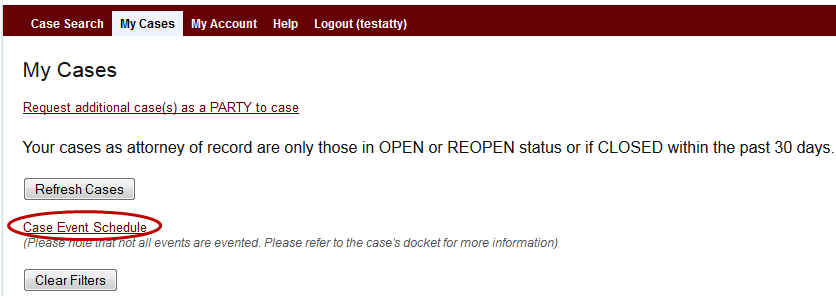
1) Go to 'My Cases' at the top while logged in.
2) Click on the option labeled Case Event Schedule.
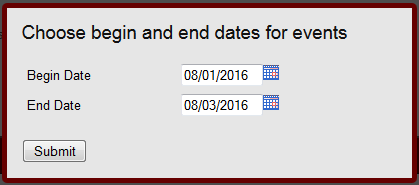
3) Input a date range and click Ok.
4) Results will show with the following information. Please remember that not all events are created so refer to the case's docket for more information.

